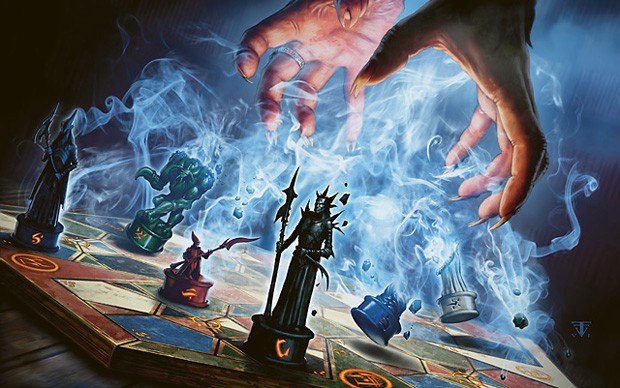
TV to Tabletop #1 Fellowship of the Session Zero
 TV to Tabletop is a series in which I examine scenes in popular movies and TV shows and break them down into game mechanics. Essentially asking, “What if this wasn’t a scripted performance with big budget special effects, but a group of players sitting around a table rolling dice?” There are spoilers for Lord of the Rings: The Fellowship of the Ring below.
*****SPOILERS AHEAD*****
Picture a group of players sitting around the table, meeting for the first time to discuss the epic series they are about to embark on. Maybe it’s a new roleplaying game they’ve never tried before, maybe it’s an old favorite with a new Game Master. They have some idea of what sorts of characters they want to portray in the coming months. They’ve got their dice and scrap paper laid out before them.
The GM enters and sits behind the screen and says, “Strangers from distant lands, friends of old. You have been summoned here to answer the threat of Mordor. Middle-Earth stands upon the brink of destruction. None can escape it. You will unite or you will fall. Each race is bound to this fate–this one doom.” This paragraph summarizes the quest that the Fellowship of the Ring is going to embark on and serves as an introduction to the tone and idea behind the series the GM has in mind. This is called Session Zero.
Not every GM uses a session zero, but I personally think that they’re the best tool in a GM’s arsenal to ensure that everyone is on the same page. Session Zero is part character design, part sales pitch, and part team-building exercise. Basically it’s the first time the players and GM meet as a group to discuss their next campaign. The Game Master will arrive with an idea of the game they want to run: an epic fantasy journey to destroy a dangerous artifact featuring ambassadors from every Free race in Middle-Earth for example. They will usually arrive at this session with some surface level notes about the nature of the world they’ve designed, the tone of game they’re looking to run, and the kinds of challenges the group will be attempting to overcome.
In the Fellowship of the Ring example, the Game Master probably brought the history of the Ring (Forged by the Dark Lord Sauron in a bygone time, the Ring was thought lost, but now that it’s returned the Forces of Evil are on the rise again), information on the Free Races of Middle-Earth (Hobbits live in an idyllic countryside called the Shire, they value comfort and home, are lucky, and usually go unnoticed by the larger races, etc.), and a brief synopsis of the current situation in Middle-Earth (Gondor has a missing king, the Elves are leaving for the West, etc.)
The players would then decide if this sounds like a game they would be interested in. There’s a chance that someone will say, “Well, this sounds a lot darker than when we were all dwarves trying to get our home back. I don’t know if I like the sound of this.” and that’s more than okay. Session Zero gives the group the opportunity to discuss their mutual interests. Players who are given the chance to talk about the game at this beginning stage will start to feel a similar sense of authorship as the GM, or they will say that it isn’t for them and no one’s time would be wasted. This will only strengthen the story for everyone involved.
Session Zero also allows the players to make sure their characters fit in the universe of the game. I mean this both tonally and in relation to the setting. This will let the players know that this isn’t the kind of game that calls for a hobbit drunkard who speaks only in fart noises or an orc slaver who collects elf kidneys and wears them as a necklace in Rivendell. Right away the GM has introduced a rich history and a certain expectation of gravitas. The players in this instance, are able to come up with characters that tie into that history (The Hobbit who’s life was upended when the Ring came into his possession, the lost King of Gondor whose ancestor was the one who allowed the Ring to survive the death of Sauron) and allows the players to figure out what sort of relationships they have with one another (The representatives of the Elf and Dwarf parties who immediately distrust and dislike each other, The son of the Steward of Gondor who doesn’t want the King to return, the aforementioned Hobbit’s gardener and best friend.)
In closing, I always use a Session Zero for any series longer than a one-shot that I run. They make sure that everyone is on the same page, they give the players a sense of ownership in regards to the world and story, and they are just a great way to communicate. You’ll be amazed at the stronger characters, the stronger stories, and the better games you play once you take the time to set the stage.


 Hello heroes! Welcome back to the series I’ve been working on with general advice for Gamemasters looking to design their own super hero adventures. So far we’ve discussed brainstorming, research, villains, and outlines, what I consider the pre-adventure building blocks. These are the things you have to have in place to write a solid story. A story which consists of what I’m going to be talking about today: encounters!